
This section outlines the process of manually installing or updating the FlowTraq web portal. It is highly recommended that you use the FlowTraq vApp to provision the web portal.
![[Tip]](../common/images/admon/tip.png) | Tip |
|---|---|
The FlowTraq vApp includes an optimized installation of the FlowTraq HTML5 web portal. It also has a mechanism for quickly and safely upgrading when new releases are avialable. |
We recommend installing FlowTraq Web on a Linux/Apache2/PHP7 stack; however, many other platforms will work.
![[Note]](../common/images/admon/note.png) | Note |
|---|---|
Note: While FlowTraq Web Portal can connect to remote instances of FlowTraq Server, the FlowTraq Command Line Tools (which are included with FlowTraq Server) must be installed locally for FlowTraq Web Portal to function. |
PHP7 interpreter and command line tools with support for Process Control (pcntl) and POSIX
Web server (e.g. apache2) with PHP7 support (e.g. mod_php)
![[Important]](../common/images/admon/important.png)
Important We strongly recommend configuring your web server to only accept secure https connections or to automatically redirect http requests to https.
| Upcoming Changes |
|---|---|
With the PHP 5.6 end-of-life on 31 December, 2018, FlowTraq re-standardized on PHP 7.2 as of the FlowTraq 18.12 release. While the 18.12 release is backward-compatible to PHP 5.4, future versions may not be. |
In general, installing FlowTraq Web is a 3-step process.
Install FlowTraq Server.
Install FlowTraq Web prerequisites (apache, php, etc.)
Install FlowTraq Web.
We have provided detailed installation guides for several common platforms. We strongly recommend using one of these platforms, with a preference for Debian or Ubuntu where possible:
OpenSuSE Linux 11 - Installation Guide
Ubuntu Linux 16 (Trusty Tahr) - Installation Guide
Debian Linux 7.0 (Wheezy) or later (follow the Ubuntu installation guide)
CentOS 6.3 - Installation Guide
| Note |
|---|---|
For Ubuntu- and Debian-based installs, the setup script used to prepare the FlowTraq virtual appliance may be used to download, install, and configure FlowTraq in place of the steps below. Contact FlowTraq Support for a copy of this install script at support@flowtraq.com. |
FlowTraq Server
Download and install FlowTraq Server by downloading the installer package, gunzipping it, and running it as root. The exact path may vary.
# wget https://www.flowtraq.com/downloads/flowtraq/flowtraq_VERSION/FlowTraq-VERSION-server-unix.sh.gz
# gunzip FlowTraq-VERSION-server-unix.sh.gz
# sh ./FlowTraq-VERSION-server-unix.sh
It will unpack the binaries and startup scripts relevant for your OS, and install (by default) in /opt/flowtraq. Command-line tools can be found in /opt/flowtraq/clitools, and the legacy NBAD/NBI toolkit is in /opt/flowtraq/nbitools.
For more information on installing FlowTraq Server, please see the FlowTraq Server Installation.
Install a license key for FlowTraq Server. The quickest way is by appending it directly to the FlowTraq configuration file. Replace the placeholders below with your own license details:
# echo -ne "user YOURUSERNAME\nlicense FlowTraq_FULL-XXXX-XXXX-XXXX-XXXX-XXXX-XXXX\n\n" >> /opt/flowtraq/flowtraq.conf
# killall -HUP flowtraq
Note that you can also install the license key through the desktop GUI.
FlowTraq Web
Using YaST, install the required software prerequisites:
apache2
apache2-mod_php5
cphp5
Download the web GUI and unpack in your webroot. The exact URI to the download may vary.
# cd /srv/www/htdocs
# wget http://www.flowtraq.com/downloads/flowtraq/flowtraq_VERSION/FlowTraq-VERSION-web.tar.gz
# gunzip -c FlowTraq-VERSION-web.tar.gz | tar xvf -
# cp /srv/www/htdocs/flowtraq/config-sample.php /srv/www/htdocs/flowtraq/config.php
Note This will create a directory called
flowtraq. You will be able to access the FlowTraq web user interface by browsing to the/flowtraqdirectory on your webserver. We recommend installing in/srv/www/htdocs/flowtraq. If you install elsewhere, be sure to configure thebaseURLconfiguration option in config.php.Configure and launch apache. Apache needs the 'MultiViews' option to be enabled. Edit the /etc/apache2/default-server.conf and change the line that reads:
Options NoneTo:
Options Indexes MultiViewsfor the default
<Directory "/srv/www/htdocs">section.The updated web interface may require your apache system to consume more memory than before. To avoid the out-of-memory condition, make the following change to: /etc/php5/apache2/php.ini
Find the line that specifies: memory_limit = XXXM And make sure it is set to (at minimum):
memory_limit = 2048M
Note This change allows PHP threads to consume more memory when needed, but only when needed. During most operations, the threads will be well below this limit.
In Yast->System->Services, 'ENABLE' apache2, which will start the apache webserver.
Now point your browser at http://127.0.0.1/flowtraq to verify that your installation was successful. Log in with username
adminand passwordadminby default. If the Dashboard appears, but the graphs and tables do not load, then your license key may have expired. Contact FlowTraq to obtain a new license key.
This concludes the installation of FlowTraq Web.
The instructions below will need to be run with sudo privileges or as root.
FlowTraq Server
Download and install FlowTraq Server by downloading the installer package, gunzipping it, and running it with sudo privileges. The specific filename and URI can be located on the current version download page.
# wget http://www.flowtraq.com/downloads/flowtraq/flowtraq_VERSION/FlowTraq-VERSION-server-unix.sh.gz
# gunzip FlowTraq-VERSION-server-unix.sh.gz
# sh ./FlowTraq-VERSION-server-unix.sh
It will unpack the binaries and startup scripts relevant for your OS, and install (by default) in /opt/flowtraq. Command-line tools can be found in /opt/flowtraq/clitools. If this is a new install, you will be prompted for a user name and license key. If they are omitted, FlowTraq will install in demo mode, which is fully-featured but accepts only 10 session updates per second.
For more information on installing FlowTraq Server, please see the FlowTraq Server Installation.
Install a license key for FlowTraq Server, if you did not provide one on install. The quickest way is by appending it directly to the FlowTraq configuration file. Replace the placeholders below with your own license details, and send the FlowTraq daemon a SIGHUP (Hangup).
# echo -ne "user YOURUSERNAME\nlicense FlowTraq_FULL-XXXX-XXXX-XXXX-XXXX-XXXX-XXXX\n\n" >> /opt/flowtraq/flowtraq.conf
# killall -HUP flowtraq
Note that you can also install the license key through the user interface on the Cluster page.
Modify your firewall settings to allow incoming NetFlow, sFlow, etc:
# ufw allow 2055
FlowTraq Web
Install the required software prerequisites:
# apt-get install apache2 php libapache2-mod-php php-cliDownload the web GUI and unpack in your webroot. Like the server, the URL for FlowTraq Web can be found on the download page.
# cd /var/www/html
# wget http://www.flowtraq.com/downloads/flowtraq/flowtraq_VERSION/FlowTraq-VERSION-web.tar.gz
# tar -xzf FlowTraq-VERSION-web.tar.gz
Note This will create a directory called
flowtraq. You will be able to access the FlowTraq web user interface by browsing to the/flowtraqdirectory on your webserver.Create a config file using the template. This file contains constants used by the user interface. Most installs will not need to change this file, but the most common change is to adjust the time zone to match the FlowTraq server time zone.
# cp /var/www/html/flowtraq/config-sample.php /var/www/html/flowtraq/config.phpEdit this file with the editor of choice to adjust parameters such as time zone. (For example, if your system time zone is PST/PDT, change the line to
date_default_timezone_set('America/Los_Angeles');)Configure and launch apache. Apache needs the 'MultiViews' option to be enabled. Edit the
/etc/apache2/apache2.conffile and, if needed change the block that reads:</Directory /var/www/> Options Indexes FollowSymLinksTo:
</Directory /var/www/> Options Indexes FollowSymLinks MultiViews AddType application/x-httpd-php .phpThat is, adding "MultiViews" and the PHP type. This applies to the
<Directory "/var/www">section, or wherever you chose to install FlowTraq Web.Important If the +/- notation is used for any option (this is not the default for Ubuntu), all options must use it.
The updated web interface may require your apache system to consume more memory than before. To avoid the out-of-memory condition, make the following change to: /etc/php/7.0/apache2/php.ini
Find the line that specifies: memory_limit = XXXM And make sure it is set to (at minimum):
memory_limit = 2048M
Note This change allows PHP threads to consume more memory when needed, but only when needed. During most operations, the threads will be well below this limit.
Restart apache2, which will start the apache webserver and enable your changes:
# /etc/init.d/apache2 restartNow point your browser at http://Your.FlowTraq.Install/flowtraq to verify that your installation was successful. Log in with username
adminand passwordadminby default.
FlowTraq Server
Download and install FlowTraq Server by downloading the installer package, gunzipping it, and running it as root. The exact filename and URI can be found on the version download page.
# yum install wget
# wget http://www.flowtraq.com/downloads/flowtraq/flowtraq_VERSION/FlowTraq-VERSION-server-unix.sh.gz
# gunzip FlowTraq-VERSION-server-unix.sh.gz
# sh ./FlowTraq-VERSION-server-unix.sh.gz
It will unpack the binaries and startup scripts relevant for your OS, and install (by default) in /opt/flowtraq. Command-line tools can be found in /opt/flowtraq/clitools, and the legacy NBAD/NBI toolkit is in /opt/flowtraq/nbitools.
For more information on installing FlowTraq Server, please see the FlowTraq Server Installation.
Install a license key for FlowTraq Server. The quickest way is by appending it directly to the FlowTraq configuration file. Replace the placeholders below with your own license details:
# echo -ne "user YOURUSERNAME\nlicense FlowTraq_FULL-XXXX-XXXX-XXXX-XXXX-XXXX-XXXX\n\n" >> /opt/flowtraq/flowtraq.conf
# /etc/init.d/flowtraq restart
Note that you can also install the license key through the desktop GUI.
FlowTraq Web
Install the required software prerequisites:
# yum install httpd mod_ssl php php-processDownload the web GUI and unpack in your webroot:
# cd /var/www/html
# wget http://www.flowtraq.com/downloads/flowtraq/flowtraq_VERSION/FlowTraq-VERSION-web.tar.gz
# gunzip -c FlowTraq-VERSION-web.tar.gz | tar xvf -
# cp /var/www/html/flowtraq/config-sample.php /var/www/html/flowtraq/config.php
Note This will create a directory called
flowtraq. You will be able to access the FlowTraq web user interface by browsing to the/flowtraqdirectory on your webserver. We recommend installing in/var/www/html. If you install elsewhere, be sure to configure thebaseURLconfiguration option in config.php.Configure and launch apache. Apache needs the 'MultiViews' option to be enabled. Edit the
/etc/httpd/conf/httpd.conffile and, if needed change the line that reads:Options Indexes FollowSymLinksTo:
Options Indexes FollowSymLinks MultiViewsin the
<Directory "/var/www/html">section.The updated web interface may require your Apache system to consume more memory than before. To avoid the out-of-memory condition, make the following change to: /etc/php5/apache2/php.ini
Find the line that specifies: memory_limit = XXXM And make sure it is set to (at minimum):
memory_limit = 2048M
Note This change allows PHP threads to consume more memory when needed, but only when needed. During most operations, the threads will be well below this limit.
Start the apache webserver, and set it to start by default:
# service httpd start
# /sbin/chkconfig httpd on
Turn off SELinux. CentOS 5 turns on SELinux by default, which prevents Apache from running outside tools via CGI, including the FlowTraq command line tools. Because /opt/flowtraq is outside the httpd_t domain, httpd cannot access it. More information can be found at http://wiki.centos.org/HowTos/SELinux
The simplest way to deal with this is to put SELinux into permissive mode. To do so, edit
/etc/selinux/configand changeSELINUX=enforcingTo:
SELINUX=permissiveThen run:
# setenforce permissiveIf you cannot put SELinux into permissive mode, it is necessary to put the
/opt/flowtraqdirectory into part of the httpd security domain, including any files needed by FlowTraq if they are placed elsewhere, such as the SESSIONDB directory. This can be done temporarily (to test) with a command like the following:# chcon -R --type=httpd_sys_content_t /opt/flowtraqOr permanently with the command:
# semanage fcontext -a -t httpd_sys_content_t "/opt/flowtraq(/.*)?"It is also necessary to set the required SE booleans to allow httpd (through PHP and shell execution) to connect to the network, which is required so that the command line tools can connect to the running FlowTraq server:
setsebool -P httpd_can_network_connect 1Now point your browser at http://127.0.0.1/flowtraq to verify that your installation was successful. Log in with username
adminand passwordadminby default. If the Dashboard appears, but the graphs and tables do not load, then your license key may have expired. Contact FlowTraq to obtain a new license key.
This concludes the installation of FlowTraq Web.
The FlowTraq Web Interface was designed to run on Unix platforms running Apache 2.2 and up and PHP 5.3 and up. Starting with FreeBSD 9.0 these packages are included the default download repository. FreeBSD versions 8.0 through 8.3 do not contain sufficiently modern versions of these packages in pre-built form. The instructions below demonstrate the installation of the FlowTraq Web Interface on a FreeBSD 8.2 system using the portsnap utility to download and install the prerequisite source packages for Apache and PHP.
To avoid conflicts in running packages, it is recommended this installation is only performed on a pristine FreeBSD system. Configure the portsnap utility with the latest port source tree and extract the sources
freebsd# portsnap fetch
freebsd# portsnap extract
Configure, compile and install Apache 2.2:
freebsd# cd /usr/ports/www/apache22
freebsd# make install && make clean
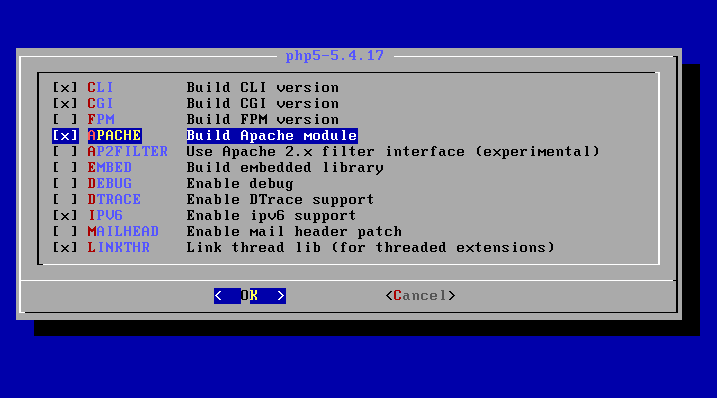
Configure, compile and install PHP 5.3. In the configuration menu, make sure to select the APACHE extension:
freebsd# cd /usr/ports/lang/php5
freebsd# make install && make clean
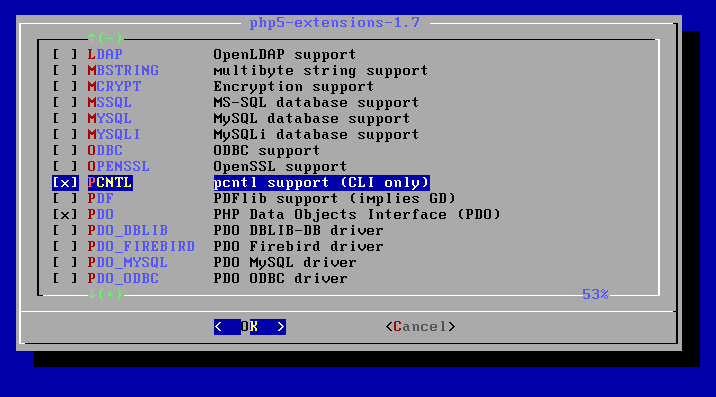
Finally, a number of PHP extensions must also be compiled and installed. Specificially, make sure all of PCNTL, PDO_PGSQL, POSIX, PGSQL, SOCKETS, BZ2, ZLIB, CALENDAR, SESSION are selected:
freebsd# cd /usr/ports/lang/php5-extensions
freebsd# make install && make clean
The last step in the installation process is configuring the packages for use. In many cases the defaults are sufficient:
cd /usr/local/etc/
cp php.ini-production php.ini
Next are some modifications to the /usr/local/etc/apache22/httpd.conf configuration file. Specifically:
Add the x-httpd-php application type in the mime_module section:
<IfModule mime_module>
    #  Default types:
    TypesConfig etc/apache22/mime.types
    AddType application/x-compress .Z
    AddType application/x-gzip .gz .tgz

       #  Add the PHP type here:
    AddType application/x-httpd-php .php
</IfModule>
Allow index.php as a directory index:
<IfModule dir_module>
    DirectoryIndex index.php index.html
</IfModule>
Enable MultiViews:
<Directory "/usr/local/www/apache22/data">
    #  Simply add MultiViews to the end:
    Options Indexes FollowSymLinks MultiViews

    #
    AllowOverride None
    Order allow,deny
    Allow from all
</Directory>
Next enable Apache to start automatically by modifying /etc/rc.conf:
apache22_enable="YES"
Start Apache:
freebsd# /usr/local/etc/rc.d/apache22 start
Installing FlowTraq and FlowTraq Web is similar on all Unix-style platforms. The FlowTraq server is a delivered as a self-installing executable that must be run by the superuser. The Web Interface is a collection of files that must be unpacked in your webroot data directory. Download the most recent version of FlowTraq server first:
For more information on installing FlowTraq Server, please see the FlowTraq Server Installation.
freebsd# cd
freebsd# /usr/local/bin/wget http://www.flowtraq.com/downloads/flowtraq/flowtraq_VERSION/FlowTraq-VERSION-server-unix.sh.gz
freebsd# gunzip FlowTraq-VERSION-server-unix.sh.gz
freebsd# sh ./FlowTraq-VERSION-server-unix.sh
Accept the EULA and follow the installation instructions. By default FlowTraq installs in /opt/flowtraq/ and will be enabled in your /etc/rc.conf. Download and install the Web Interface in your data directory of your webroot, by default /usr/local/www/apache22/data/, and creating the configuration file. In most cases the default config.php will be fine:
freebsd# cd
freebsd# /usr/local/bin/wget http://www.flowtraq.com/downloads/flowtraq/flowtraq_VERSION/FlowTraq-VERSION-web.tar.gz
freebsd# cd /usr/local/www/apache22/data/
freebsd# gunzip -c ~/FlowTraq-VERSION-web.tar.gz | tar xvf -
freebsd# cd flowtraq
freebsd# mv config-sample.php config.php
At this point you can browse to your FreeBSD 8.2 system and use the FlowTraq Web Interace on http://freebsd/flowtraq.
The most common problems encountered when installing the web portal are:
- Web root not where expected
Many newer Linux-based systems have moved from /var/www/ to /var/www/html/. It is safe to move FlowTraq Web to /var/www/html/. Care should be taken on upgrade to make note of this move, however.
- Apache configuration files not where expected
If /etc/apache2/sites-available/default.conf does not exist, or does not contain the <Directory> block, check in /etc/apache2/apache2.conf
- MultiViews not enabled
If Apache is configured and working, but navigating to FlowTraq gives the error:
The requested URL /flowtraq/login was not found on this server.
MultiViews is not enabled. Most often, if the Apache settings have been changed, the Apache service needs to be restarted.
- MultiViews enabled, but not configured for PHP
If Apache is configured and working, and the relevant config file includes MultiViews, but navigating to FlowTraq still gives the error:
The requested URL /flowtraq/login was not found on this server.
MultiViews is configured for PHP. Find the file /etc/apache2/mods-enabled/negotiation.conf and add the line:
AddType application/x-php php
Save the file and restart Apache.
- Flows in Workspace showing up with wrong time in absolute queries, but not relative queries
FlowTraq Web performs automatic timestamp correction based on browser time zone when fulfilling absolute queries. However, if the timezone listed in config.php is different from the system time on which FlowTraq Web resides, this correction will be consistently off. Ensure that the timezone in config.php matches system time (note that it does not have to be correct, or the same as the user's browser; only consistent)
